Thursday, February 28, 2013

A Look into Our Literacy Workshop


So many things have been going on in our Literacy Workshop classes...we are just a whirlwind of activity these days!!


This is the first anchor chart/activity we did for inferring. We read "The Little Red Pen" and inferred the character's traits based on their actions and words.


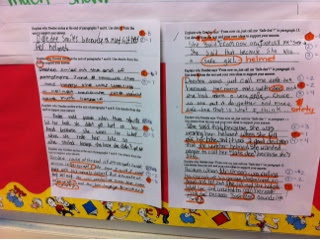
We are also working on answering reading comprehension questions using evidence and details to support our ideas. The Grade 3's in Ontario all write a standardized test in the spring and this is part of the process in getting them ready. I cut up four possible answers (an A, B, C and D graded answer) and then had the students decide what grade each answer should get. You can see the votes for each question on the right hand side, with the actual mark being highlighted in orange. It provided some great discussion as the students really had to give a reason for their grades and we took some time to dive deeper into what makes a B a B and an A an A!!


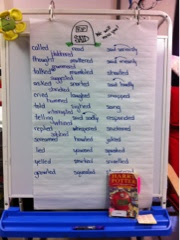
We are working on narrative writing and so...we had a funeral for said! I was very surprised by the amount of coaching my students needed for this! It took a lot of time to coax the ideas out of them and even then some really struggled with giving a different way of saying "said"...something to come back to for sure. 


This is our narrative writing anchor chart. The small paper you can see to the right is a sample story that we colour coded according to the 4 elements on the chart.


We have been continuing with our Book of the Week, but a lot of the work has shifted to the students. We are no longer working in small groups and answering orally but working towards writing our answers out on paper. A big jump for some of my little 3's.


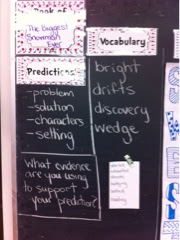
Here is some great predicting/inferring my students have been doing as well! I was so proud with how much they came up with before we even read the book. Just from the cover and the title. 


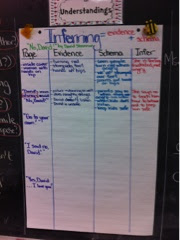
Here's the beginning of our chart showing how we add our evidence to our schema to create an inference. For this we used the book "No, David!" (always a favourite!). The rest of the chart will be filled in by the students in small groups which I will then assess to see where we are and how much more teaching is needed. From there I will be moving into more independent inferring activities in order to assess this reading skill. 


Whew!! And that's that.

What are you working on in literacy?
Have any great inferring lessons/activities I should try?
What are some great picture books for inferring??

Tuesday, February 19, 2013

Code the Text- Reading Strategy

I pulled from waaaaaay back in my bag of tricks for this strategy! It's something I used to use all the time with my 7's and 8's but hadn't had the opportunity to try it out with Grade 3's yet. I have been noticing that my students read through assigned Social Studies and Science articles very quickly and don't seem to really understand what they are reading. Using the "Code the Text" strategy is a great way to get your students to slow down as they read and to really think about the words and ideas they are reading about.

The basic idea for this strategy to create a series of codes, or symbols, that your students can write on the paper as they are reading. This way they are slowing down as they read and making a decision about their understanding. The basic set of symbols I use include the following:

- I knew that!
- That's new information for me.
- Uhhh? I don't get it.
- I think this is very important.

Based on what you want your students to learn from the reading you can always create other codes as well. Perhaps you could have code that they use to compare and contrast a previous reading, or to show character traits? It really could be anything you want.

As the students read through the text you have given them they draw the symbols right on the words/sentences that correspond with the symbols you have created. As you walk through the room it only takes a quick glance to see if a large number of students are having trouble in the same part or if they are really getting it. Or you could also collect the readings from the students and assess their understanding that way. 

I created a poster for this strategy using the great clip art from Scrappin Doodles and fonts from Miss Tiina Fonts.  Just click on the image to below to get your own copy.


Friday, February 15, 2013

Patterns Flipbook (foldable)

As we just finished our Patterning unit in Grade 3, I thought it would be fun to take a look back at the culminating task I did with my Grade 4's last year around this same time.  I wanted to comment on my student's progress on their reports so we created a flip book in class where the students could show what they know about patterns.

The first pictures show the example I made as a template for my class. They were asked to create geometric and number patterns that repeat, then growing patterns using both addition and multiplication. Finally, I asked then to make 2 different shrinking patterns. Once they had completed this part of the flip book we went back through the book and I asked them to extend and predict a term for each of their patterns. In some cases it was a term that was quite high..the 42nd term... sometimes it was much closer...the 10th term, but what I did ask is that they use at least three different methods in their flip book to extend their patterns. We had already discussed skip counting, T charts, multiplication, a hundreds chart and they were also free to use any other method they felt would work for them.

I am super proud about how they turned out!


Tuesday, February 12, 2013

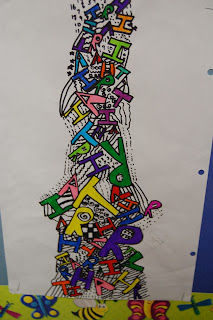
A jumble of letters and patterns...

These are the finished Name Art Projects my students completed last year when I taught Grade 4. I originally posted about it here and I am super excited with how they turned out!


Here are a few of my favourites!


I am going to have my students complete a reflection of their own artwork and the projects of others posted in our room as a way to start developing some art appreciation. Here is the reflection if you would like to see it or use it in your own room.

AND.... don't forget about the Fantastic Finds Linky Party. What have you uncovered this week?


Friday, February 8, 2013

Hot Writing

Some where along the way I learned about this great writing activity that really gets your student's brains moving. 

Materials:
- lined paper or writing notebooks (whichever you use for your class)
- pencils
- imagination

Activity:
Tell your students that today they are going to be such "hot writers" that their paper may actually catch on fire! (It really grabs their attention...lol)

The basic gist of the activity is that students will write for a length of time and they are not allowed to stop writing at all. If they run out of ideas they just keep re-writing the last word they wrote. The idea is NOT to create a cohesive piece of writing but to see how much writing you can get done in the time limit.

Start with 30 seconds- any longer is too long, even for the older intermediate students until you have done this a number of times. Have the students place their pencil on the page and start the stopwatch. The students will write for 30 seconds until you yell "stop!" They should count up their words, write the total beside their writing and draw a line underneath.

Repeat! You can slowly up the amount of time students are writing by 30 second increments. Every once in awhile you can also have a student share their writing with the class for a fun giggle. "Apple, apple, apple, balloon, monkey jumps, piano, dog, dog, dog, dog..."! The idea is that the students are trying to increase their word count each time. Students will love the challenge of this, just check every so often that they are writing REAL words!

Once your students are pretty comfortable with hot writing start to encourage them to write a mini-story each time you time them, probably once you are up to 1-2 minutes of solid writing. It's interesting to see the types of stories that come out of the hot writing.

Other ideas you can try are to have a writing prompt and everyone writes on the same topic- just wait and see the variety that happens! Also, once students can write for 4-5 minutes you can introduce a new word at every 30 second interval that they must incorporate into their stories!

Mostly, have fun with it! Hot writing is great to break through writer's block, as a quick review of a previous science or social studies lesson, and just for fun.
 
Pin It button on image hover